


Explore the complete process of lighting and compositing a shot to match a movie reference, using industry-standard software, Maya, Arnold, and Nuke. This intermediate-level workshop, led by Graham Cunningham, is designed for anyone interested in full-CG lighting workflows.
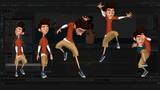
Artists will learn how to set up a basic look development light rig in Maya, import a character from 3D Scan Store, assign materials, discuss shading components, and create a turntable setup. From there, Graham instructs how to make a shot camera and set dress the environment with assets from KitBash3D. Strategies for lighting a character are also covered, including how to use dome lights and area lights for Key, Fill, Rim, and so on. HDRI maps are also utilized, and Graham explains how to modify them using Nuke.
From there, the workshop dives into the rendering using Arnold, discussing render settings, depth of field, and how to create render passes. Then jumping into Nuke, Graham assembles the render passes, splits out the light AOVs, and shows how to adjust light colors and intensities. He also details how to add atmosphere, how to use cryptomattes to fine-tune the results, how to add post effects, and lastly, how to apply a final color grade to match his chosen movie reference.
Throughout the workshop, Graham shares practical insights and industry workflow strategies to help you get your shots approved in a production environment. His Test Objects Maya file is provided as a project file with this workshop.
This workshop utilizes the Female Explorer Character from 3DScanStore, the Wreckage Kit from KitBash3D, as well as assets from KitBash3D’s Cargo.
17 Lessons
In this workshop, Graham Cunningham walks through a comprehensive production pipeline that mirrors professional VFX workflows. By establishing a clear project structure, gathering high-quality assets, and defining visual targets through reference imagery, Graham lays a strong foundation for recreating a cinematic look inspired by Blade Runner 2049. Artists will learn the full process from asset integration through final compositing, gaining practical insight into industry-standard lighting and compositing techniques.
Duration: 6m 18s

Building a proper light rig for look development requires careful calibration using standardized test objects and color charts. Graham explains that by creating lights that expose the middle gray reference to its known value, artists learn to ensure consistent accurate material evaluation across different projects. Graham highlights how understanding the technical differences between light types and maintaining clean scene organization establishes a professional workflow foundation.
Duration: 23m 33s

In this lesson, Graham goes over the workflow for importing and preparing a game character asset for rendering in Maya. Artists discover that the process requires careful attention to technical details, such as proper scaling and texture mapping, to achieve realistic results. While the character came with extensive pre-made parts, Graham demonstrates the manual work needed to properly configure materials for optimal rendering quality.
Duration: 10m 56s

This lesson highlights a professional workflow for creating realistic character materials by combining advanced shading capabilities with compositing tools for texture refinement. Graham emphasizes the importance of iterative look development and offers practical solutions to common issues, such as overly prominent texture details or color imbalances. Artists learn how these principles apply across different software packages and production pipelines.
Duration: 12m 29s

This lesson focuses on a methodical but efficient approach to look development that balances quality with iteration speed. Graham explains that successful work requires understanding both the technical aspects and strategic workflow decisions, such as appropriate camera distances and optimization techniques. By working smart and using evaluation tools like turntables, artists understand how to make informed material decisions without wasting time.
Duration: 21m 55s

In this lesson, Graham demonstrates that by creating a custom pan-tilt-dutch rig and matching physical specifications from actual film production, artists can achieve more cinematic results while maintaining precise control. This methodical approach of isolating individual attributes makes iterating and fine-tuning camera positions significantly more efficient.
Duration: 13m 9s

Graham showcases an efficient workflow for environment creation using pre-made assets, which significantly reduces production time. Artists learn how the combination of ready-to-use materials and the strategic use of specific lenses allows for convincing depth without requiring extensive scene building. Graham demonstrates why this approach is particularly effective for projects with static cameras where only visible areas need detailed attention.
Duration: 7m 39s

This lesson emphasizes that by establishing a neutral lighting foundation with properly configured environment lights, artists can iterate quickly and maintain consistency across shots. Graham explains that the distinction between lighting and color grading is crucial; artists discover that a neutral approach allows greater creative control in post-production. Graham highlights that ensuring the lighting rig is portable enables it to be shared efficiently across a production team.
Duration: 9m 5s

Achieving soft, flattering key lighting requires understanding the relationship between light size, intensity, and quality. Graham explains that while basic lights provide a starting point, more sophisticated approaches using custom light maps offer superior softness and wrap-around qualities. Artists learn the importance of balancing realistic lighting with the flexibility of digital tools while maintaining proper technical workflows for professional-quality character lighting.
Duration: 15m 22s

This lesson demonstrates that sophisticated outdoor lighting can be achieved by layering multiple environmental lights with customized textures rather than relying solely on single light sources. Graham explains that while the visual differences may appear subtle in basic scenes, this technique adds realistic complexity through cloud detail and atmospheric effects. Artists learn that properly preparing environment maps pays off in more photorealistic final renders.
Duration: 8m 41s

This workflow prioritizes flexibility and adjustment speed by separating lighting elements during rendering and putting off final adjustments to the compositing stage. Graham explains that while rendering separate light passes requires more upfront time, it enables real-time adjustment of light intensity and colors without re-rendering. He highlights how this approach balances technical efficiency with artistic control, following professional cinematography principles.
Duration: 8m 51s

Graham explains how successful rendering requires careful attention to technical details like sampling configuration and accurate focus calculations. By implementing these techniques, particularly the overscan for compositing flexibility and organized file output structures, artists can create professional results while maintaining manageable render times and providing compositors with the necessary control elements for final render refinement.
Duration: 16m 2s

This lesson emphasizes the importance of a modular rendering approach in professional production workflows. Graham explains that by separating scene elements into distinct render layers, artists gain flexibility for iterations and optimize render times. This approach to testing and organizing output files demonstrates industry-standard practices.
Duration: 13m 29s

This lesson is an overview of compositing fundamentals, emphasizing proper color management and the critical importance of managing transparency when working with image layers. Graham explains that a back-to-front layering approach creates an organized structure that makes complex projects easier to manage. Artists learn why understanding these core concepts is crucial for avoiding common edge artifacts and achieving professional-quality results.
Duration: 17m 31s

Multi-light compositing provides creative control by separating render lighting into individual passes that can be adjusted in real-time during post-production. Graham demonstrates how artists can iterate on lighting decisions instantly without expensive re-renders by implementing smart labeling practices. This approach brings lighting controls into the final stage, enabling rapid experimentation with light color, intensity, and combinations to achieve the desired final look.
Duration: 16m 48s

Emphasis is placed on the idea that achieving a cinematic look requires understanding both technical workflows and color science. Graham explains that professional color grading occurs within specific color spaces and that building atmospheric depth through layered effects yields much more realistic results. Artists master how to match heavily stylized reference imagery while maintaining control over individual elements of the image.
Duration: 18m 47s

In the final lesson of the workshop, Graham highlights that extensive refinement of the final composite is often necessary to achieve cinematic quality, even with good 3D renders. Graham demonstrates creative use of render passes to solve problems rather than relying on time-consuming manual techniques. The workflow demonstrates how technical knowledge, combined with artistic sensibility, can transform a basic render into a polished, film-quality final image.
Duration: 19m 52s

Primary tools
For this workshop you’ll need:
Project Files
When you download the workshop files, you'll get access to Graham Cunningham's practical lighting and compositing Maya scene. Inside, you'll find:
- Maya project files (.ma) – The original 3D scene files you can open and edit in Autodesk Maya
Skills Covered
Who’s this Workshop for?
Graham Cunningham's intermediate-level workshop is designed for CG artists, lighting artists, and compositors with foundational knowledge of Maya, Arnold, and Nuke. It's ideal for professionals looking to strengthen their full-CG lighting workflows and gain a clear understanding of industry-standard shot production pipelines.
Students, junior artists, and artists transitioning into lighting or compositing roles will also gain tremendous value from this training. The workshop delivers practical, production-ready techniques that bridge the gap between basic software knowledge and professional shot delivery
Learning Outcomes
Upon completing this workshop, artists will have developed skills in full-CG lighting workflows, from initial setup through to final compositing and color grading.
Key skills include:
- How to set up professional look development light rigs in Maya for character work.
- How to import and integrate assets from 3D Scan Store and KitBash3D effectively.
- How to implement strategic lighting setups using dome lights, area lights, and HDRI maps.
- How to modify HDRI environments in Nuke for enhanced lighting control and flexibility.
- How to configure Arnold render settings and create organized render passes for compositing.
- How to assemble and adjust render passes using light AOVs in Nuke compositing workflows.
- How to add atmospheric effects, utilize cryptomattes, and apply targeted post-production enhancements.
- How to execute final color grading techniques to match specific movie reference standards.


