

18 Lessons
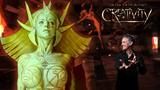
In this workshop, John Brown introduces the core principles of character sculpting, focusing on anatomy, depth relationships, and viewing-distance compensation. These foundational concepts provide the framework for creating sculptures that feel natural, dimensional, and engaging, forming the basis for all techniques explored throughout the series.
Duration: 19m 12s

In this lesson, John demonstrates how to create a quality silicone mold to produce numerous clay casts for creating different facial expressions or variations without repeatedly sculpting the base model. The method emphasizes careful planning, from sealing the original sculpture to strategic mold cutting, ensuring successful reproduction of detailed sculptural work.
Duration: 6m 24s

This lesson explores the technical process of sculpting facial expressions, focusing on the smile. John demonstrates how, despite dramatic changes in expression, underlying anatomy and proportions must remain consistent. By casting multiple heads and maintaining visual continuity with the original character, artists learn how to efficiently create a full range of expressions while preserving character identity.
Duration: 19m 47s

This lesson looks at creating an angry expression. John’s continued emphasis on understanding essential facial anatomy, shows how crucial it is to get right as it allows artists to push expressions to their limits without losing realism. By working from neutral to smile to anger, he shows how the same character can display a full range of emotions in sculpture while remaining recognizable.
Duration: 23m 25s

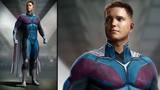
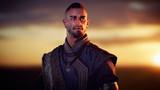
In this lesson, John starts working on a fantasy character while considering questions about his character's origin, environment, and psychology. John advocates for originality through coherent design choices rather than arbitrarily mixing animal features or copying popular styles. By maintaining anatomical fundamentals while thoughtfully integrating different references, John creates characters with genuine depth and realism.
Duration: 25m

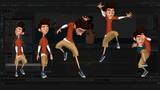
In this lesson, John demonstrates how strong character design begins with personality and story. Using the "Lenny and George" archetype, he explores creating contrasting yet complementary characters, starting with the "Lenny" type. Through deliberate choices in proportion, feature placement, and anatomical exaggeration, he shows how sculptors can communicate clear, memorable traits; highlighting that effective character work prioritizes storytelling over technical perfection.
Duration: 23m 32s

In this lesson, John sculpts the counterpart to the "Lenny" character, emphasizing storytelling before technique. He demonstrates how answering key questions about personality and life experience, and translating traits like intelligence, cunning, or paranoia into physical features, allows sculptors to create memorable, character-driven designs that resonate with viewers.
Duration: 41m 7s

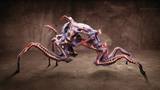
In this lesson, John outlines an efficient digital painting workflow that leverages real-world photographic references to create a believable alien-esque character. By selecting reference materials based on textural and anatomical similarities in the model, such as using elephant skin for alien texture, John achieves realistic results while maintaining creative freedom.
Duration: 2m 9s

In this lesson, John begins to establish a workflow for digitally coloring sculptural photographs in Photoshop through layered color application. He uses proper organization, systematic color selection through Hue/Saturation adjustments, and isolation of elements to create a flexible framework for more detailed work. This set-up allows him to easily navigate and modify his work throughout the digital coloring process.
Duration: 6m 39s

In this lesson, John demonstrates adding realistic eyes to a character sculpt using photographic reference. He covers layer naming, opacity control, and edge refinement, highlighting how matching opacity and planning for future adjustments reinforces the importance of iterative refinement in digital character design.
Duration: 5m 59s

In this lesson, John shows his process for adding skin tone and variation of color in Photoshop. He shows to create seamless transitions using careful blending of sourced photo materials with hand-sculpted details, variable opacity settings and the eraser tool. By working non-destructively on separate layers and continuously adjusting transparency, John achieves organic-looking results while maintaining control over individual elements.
Duration: 10m 16s

In this lesson, John demonstrates realistic color blending, emphasizing patience, brush experimentation, and gradual layer buildup. While digital tools offer unique advantages, he shows that core artistic principles, blending and working from light to dark, remain consistent across both digital and traditional media.
Duration: 7m

In this lesson, John uses traditional painting principles with digital advantages, particularly opacity adjustments, non-destructive color layers, and strategic highlight placement, to create convincing organic textures. Realistic skin rendering requires building up multiple subtle color variations, rather than relying on single flat tones.
Duration: 18m 46s

In this lesson, John demonstrates that successful blending and natural-looking results come from careful attention to technical details like opacity, brush flow settings, and proper layer management, combined with artistic judgment about color placement and intensity.
Duration: 4m 39s

In this lesson, John continues to show how the paintover process is an iterative, experimental one, requiring patience and constant adjustment. He discusses carefully observe reference material, managing layers, and explains how artists should be willing to repeatedly adjust settings until the desired natural appearance is achieved.
Duration: 15m 15s

In this lesson, John demonstrates how to create realistic dry skin textures. The key to success lies in working with very low opacity settings, building up color gradually, and constantly alternating between adding detail and blending it back. Using this approach, John can quickly visualize and sell creature concepts digitally without the time and expense of physically painting his model.
Duration: 26m 53s

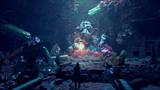
This lesson looks at John's method for adding a background to his composition to integrate his character artwork with the environment. Success relies on color matching between foreground and background elements through careful adjustment of saturation and color balance, while proper layer management and compositional techniques ensure a cohesive final image. John’s approach demonstrates how thoughtful color grading can transform his desert scene into an Martian-esque landscape that complements the character design.
Duration: 7m 33s

In this final lesson, John finishes his composition by showing his process for integrating background elements into his scene. A large part of this involves preserving layered versions of his work before flattening the image in Photoshop. By understanding how individual layers contribute to the final image and using techniques like edge blurring and hue/saturation adjustments, John shows how artists can create more polished, professional-looking digital artwork with better integration between foreground subjects and backgrounds.
Duration: 13m 42s

Skills Covered
Who’s this Workshop for?
This workshop is designed for intermediate to advanced sculptors wanting to refine their character and expression skills. It's perfect for practical artists and 3D modelers across disciplines who want to gain insight into fantasy character development through traditional modeling and casting methods.
The combination of traditional sculpting with digital painting and compositing techniques that John Brown demonstrates creates a unique skill set that bridges physical and digital art production, making viewers more versatile in their work processes. That being said, digital artists, illustrators, and hobbyist sculptors will also find applying these techniques valuable for improving their work.
Learning Outcomes
By completing this workshop, artists will learn advanced sculpting techniques for creating expressive character busts and transforming them into more fully realized fantasy characters.
Key skills include:
- How to sculpt anatomically correct quarter-scale male busts using advanced theoretical foundations.
- How to create efficient molds and casts that preserve original models for multiple iterations.
- How to sculpt distinct emotional expressions while maintaining character consistency and visual continuity.
- How to transform basic character models into detailed fantasy creatures through advanced sculpting.
- How to apply professional molding techniques that save time and energy in production workflows.
- How to integrate traditional sculpting with digital painting techniques using Adobe Photoshop for finishing.


